
MARQ Alicante utiliza cookies propias y de terceros para mejorar su experiencia de navegación
y realizar tareas de analítica. Si continúa navegando, entendemos que acepta nuestra política de calidad y de cookies.
MARQ Alicante utiliza cookies propias y de terceros para mejorar su experiencia de navegación
y realizar tareas de analítica. Si continúa navegando, entendemos que acepta nuestra política de calidad y de cookies.
.jpg)
.jpg)

.jpg)
.jpg)
.jpg)
.jpg)
 v
v
Click on the images to access each workshop
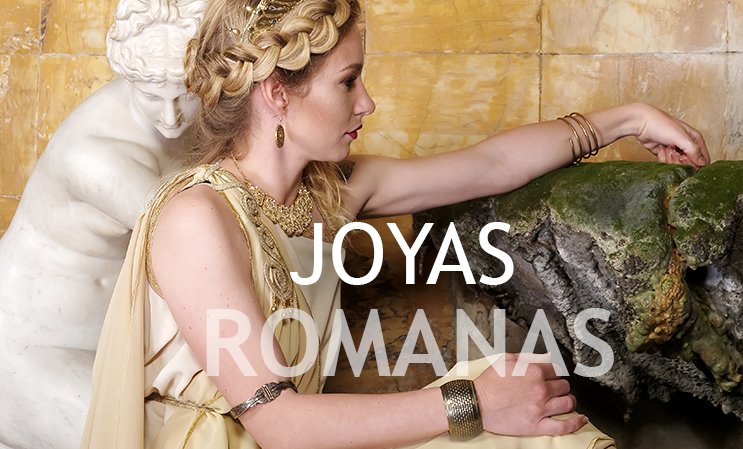
ROMAN NECKLACE AND BRACELET MATERIAL
Roman women, especially from the high society, used jewerly and other ornaments. As nowadays, there were different kinds of jewerly: earrings, necklace, rings, bracelets, broochs, hair needles, …
Most apreciated were jewerly made by gold. And, maybe, the most flashy were necklace and bracecelet.
Would you like wearing your own roman jewels? If you don’t, don’t be afraid and gift them to your mother or granny.
We will need:
Steps:
1. We will start with the bracelets, we will take the cardboard and we will cut it from top to bottom.
2. We are going to cover it with the material that we want, for example I do it with albar paper to give it that metallic touch, although it could also be with cardboard and paint it in a silver or gold color.
3. Once it is ready, we begin to decorate it, we can make geometric shapes or any other type of drawing that we like.
4. Now we will make the necklace, we will take a sheet of paper and we will make the shape that we like, being able to make the central part wider to be able to decorate it more or make everything equally fine. Once we have it, we will cut it out and look at how it would look. If the necklace falls off we will have to lengthen the necklace a little more.
5. We trace it on the cardboard once we have the exact measurement and cut it out. Now that we have it we can start decorating just like with the bracelets.
.........
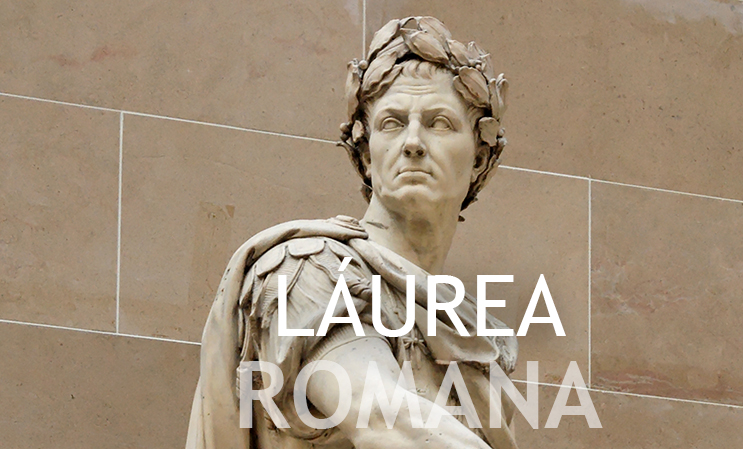
ROMAN LAUREA (LAUREL CROWN)
The Crown with laurel was given to the roman generals that won a war o an important battle. Maybe you don’t know that during the Olympic Games in Ancient Greece, this Crown was given to the winners, but was a olive leaf Crown. Romans continued with this tradition, but with laurel. The name of this Crown is “Laurea” and comes from the name “Laura”.
Now, make a crown with laurel and, if you do it well, put it on your head. You deserve it!
Materials
- Laurel leaves or some material, to be able to be golden, type EVA rubber, cardboard, fabric, etc.
-Brush
-Liquid paint, tempera or acrylic type, red and gold
-A headband or wire.
-Ribbon
-White glue or similar
-Porex balls or some bracelet or necklace made of spherical beads, made of plastic
-Pencil
-Cardboard
-Scissors
Realization
We will give a first layer of red color to our bay leaves, this increases the quality of the subsequent gilding. But it is not essential.
Normally, if we have spread the paint well, when we have painted the last one we can continue the work with the first one, since it will have dried.
The painting will always be on both sides of the leaf, front and back.
When all the leaves are dry, we will begin the browning process.
We will give as many layers of gold, on both sides, as we think appropriate, until we achieve the desired shade.
Not always, with a first layer of gold, the tone we want is reached.
While the different layers of paint are drying we can advance the work and resume the leaves as we take steps.
We will paint the small balls of porex, or failing that of some necklace or bracelet of beads, in a golden tone, and we will let them dry.
We will make the frame of our laurea with the wire and ALWAYS with the supervision and help of an adult, or we will use a headband. We will cover the frame with the tape. If it is of a yellowish, ocher, golden, etc, is more better.
In the case of using a headband, we will also cover it, to facilitate the gluing of the leaves. If it is already lined, it would not be necessary.
We will be observing the leaves and if they are dry and to our liking, we will begin the gluing process.
Lots of patience. LET US REMEMBER THE IMPORTANCE OF DRYING TIME.
We will group the leaves into two blocks, trying to ensure that their sizes are well distributed.
We will start gluing on the front, that is, on the part of the frame or headband that is open.
At the ends we will glue the larger leaves, two by two, and we will glue them back, which will be the nape of the neck, decreasing in size.
Once they are all glued, we will glue the golden balls distributing in clusters of two or three in the joints of the leaves and some loose on top of some leaf.
As soon as everything is dry our laurea will be finished.
NOTE: In case you do not want to use laurel, we have the option of making leaf patterns with the cardboard and take them to materials such as EVA rubber, golden cardboard, fabrics, ...
..............
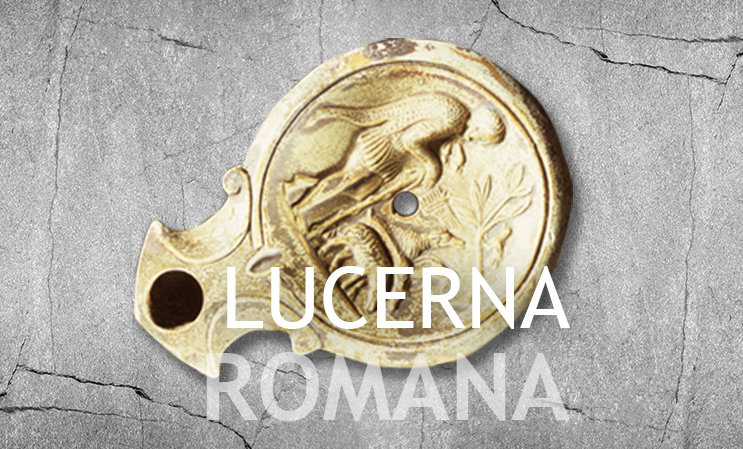
ROME WORKSHOP: LUCERNA
Have you thought how romans light their homes up? They used little clay lamps that called “lucernas”. “Lucernas” could be differents, and made by bronze, for example. But all of them had a storehouse to contain oil, a canal top ut the wick and a handle for holding and carrying it.
“Lucernas” could be decorated with mythological motifs, gladiator scenes or Christian motifs.
Now, make a “lucerna”, but be carefull and don’t burn yourself!
Materials:
-paste of salt (1 cup of whiteflour + half a cup of salt + water mix untilthe paste isformed)
-toothpick
Procedure:
-Shapethelucerne pasta, itwill be placed onthetableby pressing the pasta a little in a circle and
ending in a point. Ifyouwantyou can reserve a little of thesalt paste tomakethehandlesonboth
sides.
-Withthetoothpicktwoholeswill be madeone in thepart of thetip and theother in themiddle of
thecircle.
-Thenwewilldraw a circle and insidethiswewillmaketheflowerpetals.
-Wewillletitdry and ourRoman lucerna would be ready
........
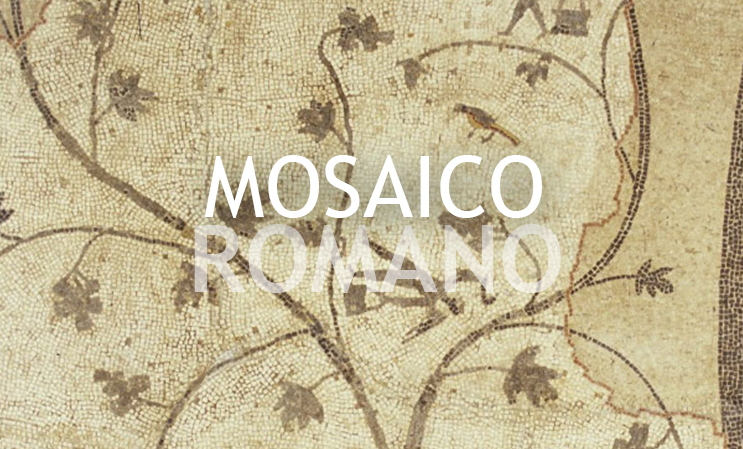
WORKSHOP: ROMAN MOSAIC
Do youknowwhat a mosaicis? Mosaicis a decorativeworkthatconsist in made a paintingwithtinnystones of differentcolors. Everypiece of stonelengthabout a centimetre and itiscalled “tessera”. “Mosaic” is a latin Word thatmeans “madeby muses”.
Now, do yourownromanmosaic, butwithothermaterials and… be inspiredby muses!
Tomakeour home mosaic WE WILL NEED:
Coloredcard stock / magazine clippings / whitecoloredpaintedsheets
Scissors
Ruler
Pencil
Gluestick
STEPS tofollow:
• The firstthingwill be tocutourtesseraewithany of thematerialsnamedabove.
• Wemarkstrips of more orless 1cm wide and cutthem.
• Once wehavethestrips, wewillcutthemintosmallsquares of approximately 1cm.
• Onanotherpiece of cardboard, wepencil in thedesign of ourmosaic.
• And once wehavedrawnourmosaic, wejusthaveto paste tile to tile withstickglue.
Ifyouhave a laminator at home, or quite zealous, you can laminateit and evenmakesomefuncoastersorwhateveryou can think of!
Enjoyyourselves!
.............
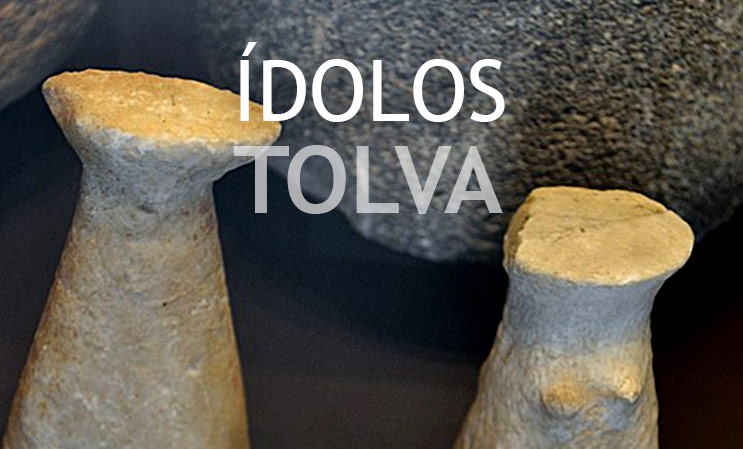
This time we are going to represent another kind of idol from our Prehistory. We are talking about the Hopper idol, a kind that it was made by stone or ivory. Its shape is easy to identify: it has long shape with a narrow at the top that represents necks. At the bottom, Hopper idol has a wide-hipped.
Sometimes these idols represented women and they had represented the femenin breast.
So come on, and make you own Hopper idol!
MATERIALS:
1. 1 glass of flour
2. 1/2 glass of salt
3. 1 glass of water
4. 1 taper
5. bowl
6. spoon
STEPS:
1. We take a bowl and put the whole glass of flour. Then we pour the 1/2 glass of salt and move everything together to mix it.
2. We begin to play little by little and we move it. Of this there is no measure. We will add confirming let's see that we still need it.
When we see that everything starts to look like a ball then we will have it ready.
3. Once we have all the ingredients in place 2 things can happen to us
3.1 The dough cracks due to lack of water, so we will put a little more
3.2 We see that the dough is very soft and pasty, so we will add small handfuls of flour.
4. We will introduce the dough in a taper with a lid and put it in the fridge for 30 min.
5. Once the time has elapsed, we take it out and we can start working on it without any problem.
We will do the churro technique, making a round shape and with the 2 flat bases (top and bottom).
6. We make a cleft to mark the separation of the head and the body.
7. Once our idol hopper is finished, we will let it dry for 2-3 days. It should be kept in a place where it has ventilation but not put it in the sun or in humid places.
note: They can put coloring once the dough is made to be colored, although we are making a representation imitating ivory, therefore, off-white.
....
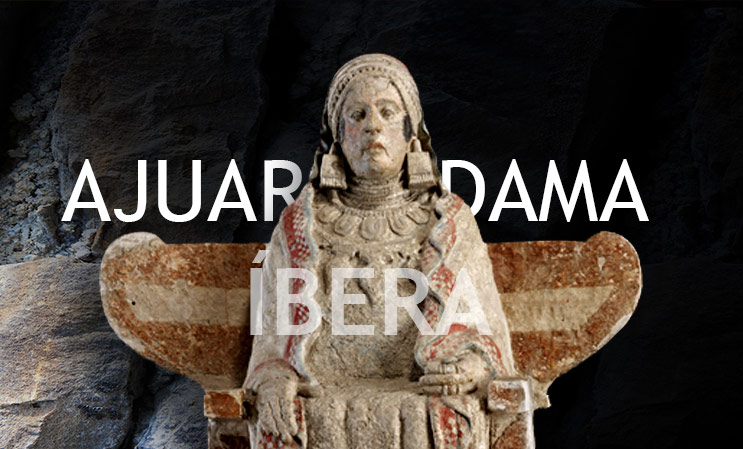
Do you know what is a dowry? Dowry is a collection of pieces of value and jewels that belong to a person. Sometimes, archeoligsts use “dowry” for talking about grave goods they found. We are going to allude to personal objets and jewels that iberian women used in daily life.
We are going to talk about “buns”, a kind of circular pieces that iberian ladies used as a headdress. Probably, this buns works for tie hair back. Maybe, buns were made in wood and were used with a tiara and a cape.
Do you know a famous sculpture that wear this buns? Lady of Elche! Also, Lady of Cabezo Lucero (Guardamar) wears buns, as you can see in the iberian culture room at MARQ. Now, you can wear yourself buns, as a iberian lady and, who knows? Maybe people believe you are the Lady of Elche.
Materials:
1. Two plastic circular lids from a container or something similar (cardboard or other half hard material)
2. Cardboard
3. Pencil
4. Rule
5. Compass
6. Scissors
7. Wool or lace
8. Gold paint (in case you want to paint the bases of the impellers)
9. Brush
10. Glue
11. EVA rubber or some gold/metallic material
12. Headband
Realization:
With one of the circular covers, which will be the bases of our cases, we will draw its circumference on the cardboard twice.
Before we start with the patterns, and once the circumferences are done, we will paint our bases with the golden paint (this is optional).
Returning to the circumferences made on the cardboard, one of them we will let circulate and the other, helping us with the compass, we will make another circumference, smaller, in the center. With the ruler, we will be drawing lines from the outside of the small circle to the large circle. This will mean that, when we cut our patterns, one will be circular and the other we will be able to give it a helical shape (helix), cutting alternate sections (one yes one no), until we get the shape of a gear.
If we want to give a little more relief to our cases, we can take advantage of the small circumference, made with the compass, making it again on cardboard to get a new pattern. This will make us add volume to our final result.
Once we have the patterns ready, we will draw them on the EVA rubber or the chosen materials. We will cut out our final shapes and reserve them for assembly.
We will prepare the patterns, on cardboard, of what our necklaces will be, we will cut them out, we will draw them on the chosen material and we will cut out the final pieces.
We will begin to assemble our impellers by gluing the circular bases to the EVA rubber circles. Subsequently the helical shape on top and to finish the small circle in the center.
We will glue our impellers on both sides of the headband.
We will cut two sections of wool or cord, one longer than the other, to mount our necklaces and we will start by gluing the largest pieces in the longest section and the smallest in the short section.
We can reuse the discarded eyelashes of the helical shape of our impellers to add as a bead to our necklaces.
With this we would have finished our jewels of the Iberian Lady.
NOTE: It is important to respect the drying times of the glue or glue. Otherwise everything will be disassembled,
….
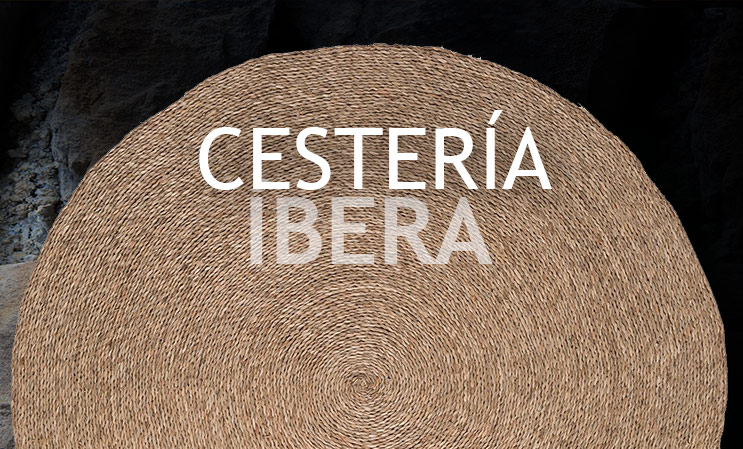
Iberians were great artisians, and one of their best Works was the basketmaking. They made baskets of all types and different objets like mats or shoes, just made with straw. In MARQ you can see tracks on clay of a straw mat they used as a decoration at home, and rests of a straw braid half-carbonised.
In this workshop you will discover how to start to make a basket (just the down part) of straw, like our iberian ancestors but with our own materials.
MATERIALS:
1. Somekind of ropeorthickcord
2. Thread
3. White glue
4. Cardboard
5. Scissors
6. Brush
STEPS:
1. Cut 3 pieces of rope of approximately 1m
2. Tiethe 3 ropes at oneendwith a piece of string.
3. Make a tightbraid.
4. Whenitisfinished, tietheendwithanotherpiece of thread.
5. On a piece of cardboard, starttogluethebraidwithwhiteglue, making a spiral (thebraidmust be glued flat and withoutspaces, so that at theendthereis a circle)
6. Weletitdry.
7. Once dry, wecutouttheexcesscardboard. The final resultshould be a kind of coasterorplateholder.
Dependingonthelength of thebraid, you can makeyour "basket bases" in differentsizestogiveitthe use youwant.
Youwillseethatthework of braidingisnoteasy at all... so imagine workingwith esparto grass!
Seeyounext time, friends!
…..
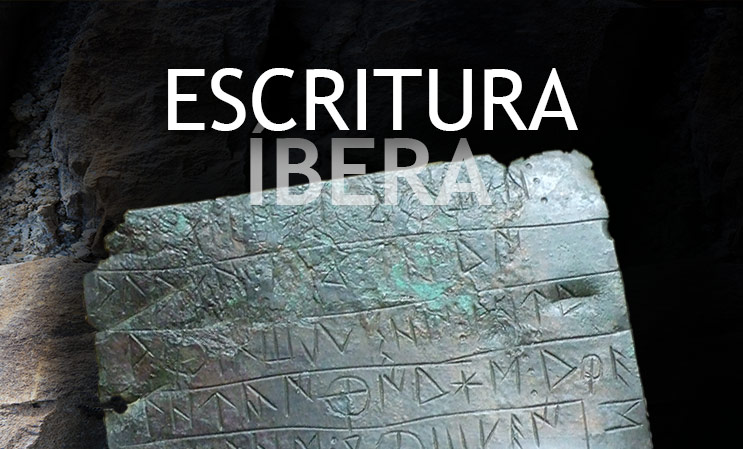
As you already know, iberians didn’t invent writting, just copied greek writting from traders. This iberian alphabet, is known as “greek-iberian”. Paper didn’t exist on that age, so we have found writting in pottery (like in Illeta dels Banyets) or in lead, as in La Serreta (Alcoy). This leads had written trade texts, maybe contracts.
Now, make your own inscription with words you like, as your name or surname. Image helps you to do it.
Materials:
1 cup of whiteflour + half a cup of fine salt + wateruntilyougetthesalt paste
A containerto mix theingredients
Toothpick
Process:
Mixtheflour, salt and water and kneaduntilyougetthesalt paste
Thengivethesalt paste a plateshape
Withthestickmaketheinscription, thenameortheentirealphabet.
Letdry and paintoptional.
......
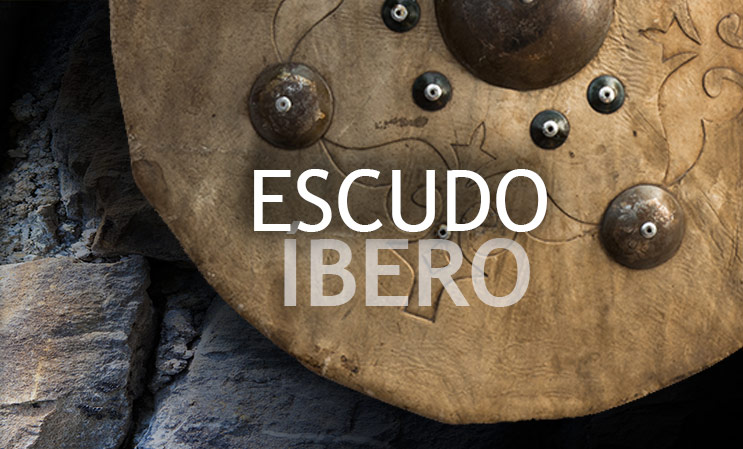
Warriors were a important part of the iberian society. Probably you know what is the most impresive of the iberian’s weapon: the falcata. But, do you know how was them shield? And, do you know how them call it? It was the “caetra”, and was round and small.
Do you want to have your own caetra? In this workshop you could do it yourself!
IBERIAN SHIELD MATERIAL
We will need:
1. Eva rubber, foil, cardboard
2. Scissors
3. glue or fixo
4. Bar Note paper
5. Markers
Steps:
1. We take a frying pan, or something that we have round. On cardboard, eva rubber, foil, cardboard, etc. We will draw the circle of the size that we want. Once we have it we cut it
2. We will take another type of object to make a second sphere much smaller. We will make the circle and we will cut it again.
3. The second circle we have made, we cover it with white paper simulating its silver color or painting it gray.
4. We will make some type of decoration to stick it around our shield, it can be painted with a marker or making some figures with eva rubber or foil.
5. On the back of the shield, with a piece of cardboard, folio, etc. we will make the grip, covering it if we wish with a silver color or painting it to give it a more real appearance.
....
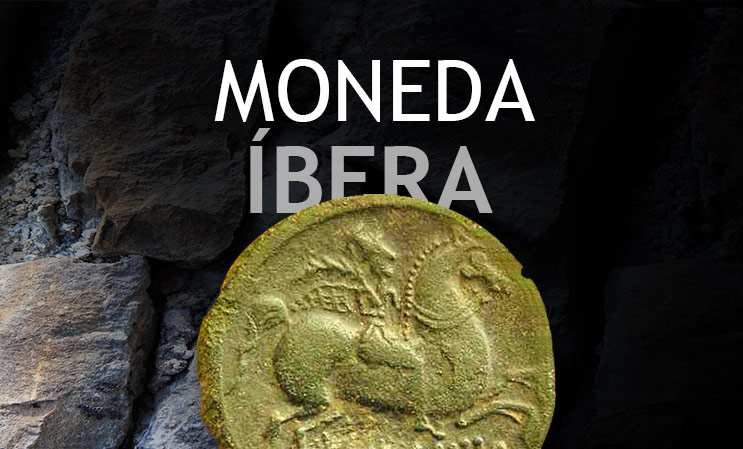
Would you know that the first coins we found are from iberian period? There are coins of silver and bronce thath greeks and carthaginians brought here. This means that our first coins are foreingers and iberians copied them because they could used them for paying warriors and soldiers. Coin that iberians made after had represented a man head and a horseman, with the name of the city where was made.
Now you know how coins were, mints your own coin… and don’t forget to writte “Saiti” , because it was the only city that had mint.
MATERIALS:
1. 1 glass of flour
2. 1/2 glass of salt
3. 1 glass of water
4. 1 taper
5. 1 bowl
6. 1 spoon
7. Food coloring, pepper, cinnamon, etc.
8. Chopsticks
STEPS:
1. We take a bowl and put the whole glass of flour. Then we pour the 1/2 glass of salt and move everything together to mix it.
2. We begin to add water little by little and we move it. Of this there is no measure. We will add confirming let's see that we still need it.
When we see that everything starts to look like a ball then we will have it ready.
3. Once we have all the ingredients in place 2 things can happen to us:
3.1 The dough cracks due to lack of water, so we will put a little more
3.2 We see that the dough is very soft and pasty, so we will add small handfuls of flour.
4. We will introduce the dough in a taper with a lid and put it in the fridge for 30 min.
5. Once the time has elapsed, we take it out and we can start working on it without any problem.
6. We take a piece of dough, the one we need to make a coin, it can be the size that everyone wants, it is important to remember that if it is very thin, the coin when it dries can break.
Add if you want some type of food coloring, pepper, cinnamon or other to give it an old touch.
7. We will flatten the chosen mass and give it a round shape. Once we have it, with a toothpick we will make indentations or marks, making the selected drawing.
8. Once the coins are made, we will let them dry for 2-3 days and they will be ready to start playing with them.
...
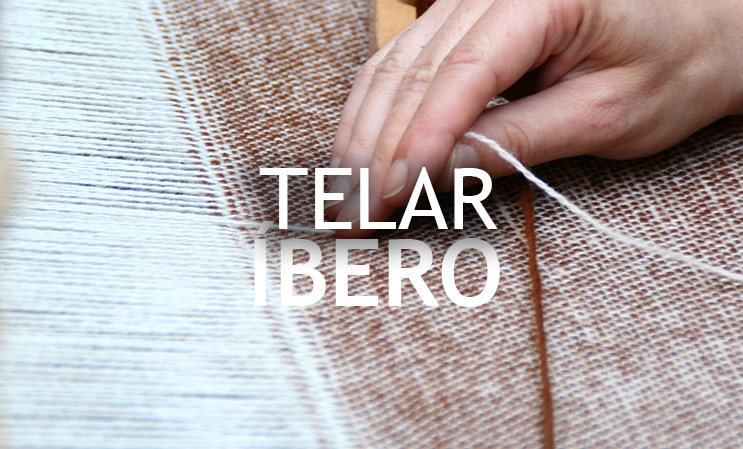
Iberians made their own clothes. They made them in wool and linen and iberians used a loom. You know what is a loom, don’t you? It is a gadget with strips that hold the threads in vertical positition. For hold threads tense, iberians used stones or clay weights, that archeologist find sometimes during archeological excavations.
Would you like to make your own loom? Follow our directions and you will get it!
For the realization of this workshop WE WILL NEED:
A piece of cardboard (for example, from a shoebox or a cerealbox)
Wool (you can also use a cloth or cut thin strips of an old T-shirt)
Adhesive heat
Scissors
STEPS:
Cut a cardboard rectangle.
Make cuts of approximately 1cm at the top and bottom.
We insert one end of the string in to the first cut and glue it zealously from behind so that it does not move. Next wer oll the string to the cardboard passing cut by cut, so that all the strings a revertically on our loom cardboard.
To start knitting (left to right), we leave space above and start passing the wool between the strings: one string above, and another string below and soon.
When we get to the extreme and we have to start knitting the next row (right to left), you have to look good at the last string: if the wool is above it, you should start the next row by passing wool below. With the video you will understand it better.
Thus, we will weknit our little tapestry until we give it the desired size.
Don't forget to go up every rows other eareno gaps between the wools.
To close the dots on cethe tapestry is finished, you'll need tocut the strings (up and down) carefully and tie them with two knots with each other: the first with the second, the third with the fourth... And so on with all of them.
Finally, if you have left loose woolends at the ends, you can tuck them behind the tapestry (either interlacing or gluing them with glue)
And finally, if you want, you can add fringesor a rope to hang it on the wall.
I hope you like knitting by hand like the Iberians and the Iberians and you get some great creations.
Enjoy your selves!
....
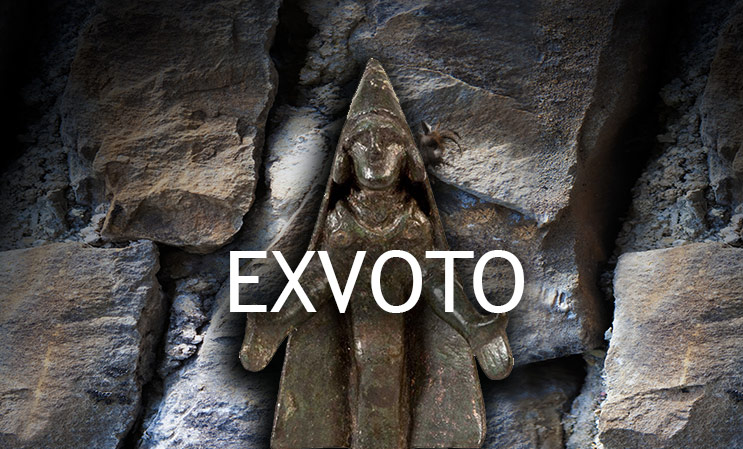
IBERIAN WORKSHOP: VOTIVE OFFERING
Iberians made votive offerings in order to gain gods favours. These offerings could be small figures in bronce or clay, and they represented warriors, animals, foodstuff, parts of human body or herbal essences.
Iberian votive offerings were place in sactuary or temples. There were found votive offerings in clay which represented human head with some physical defects in Alicante.
Don’t be afraid if your votive offering is not perfect. Iberians were not perfects too.
Materials :
Process:
In this workshop we will make a plaque idol as or ancestors made. This kind of idol used to make with schist. Its shape was rectangular or trapezoidal, but always flat. Sometimes, it was want to represent head clearly – they made the top with an annex shape. This plaque idols could have two boreholes for hang them… Don’t be their eyes!!
Don’t forget to decorate your plaque with lines and triangles, and you could paint it too! This decoration will represent idol clothes.
Materials:
salt paste (1 cup whiteflour + half a cup fine salt + watertoformthe paste)
toothpick
black and whitepaint
Brush
Process:
Wecrushoursalt paste toleaveit flat, notverythin.
Withthetoothpickwedrawtheshape of theidolmarkingwell and removewhatisleftover.
Wedecoratewiththetoothpickontheidol.
Weletitdry, and once drywepaintit.
Hello, friends!
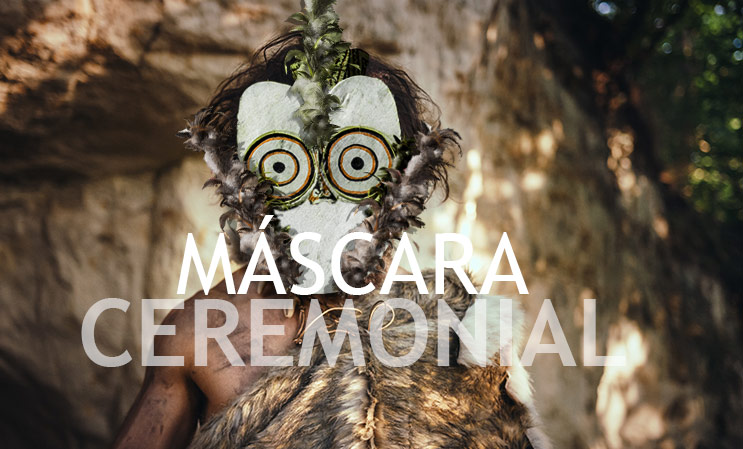
It is time to imitate a ceremonial mask from Prehistory.
Do you know what is a mask? It is a simbolyc object, meaning those full of mystery that prehistoric people used to cover up their face or head in sacred rituals. We don’t know what is the meaning but priests used it for ask to gods or ancestor for being successful on hunting or interpret their dreams. Who knows?
Certaily, mask uses to cover up the real face and asume as another identity, maybe a powerfull animal or a supernatural being.
We are going to imitate an idol mask from the temporary exhibition “Idols, millenary gazes”. In this way, we will be an “idol” for an instant.
máscara ceremonial from MARQ Arqueológico de Alicante on Vimeo.
Materials:
-EVA rubber, cardboard or consistent paper
-Pencil
-Scissors
-Tempera or acrylic (Failing that colored pencils or markers)
-Brush
-Kraft paper or similar
-Hemp thread or other kind of thread or cord with a little
thickness
-White glue or glue
-A piece of rubber (To be able to fasten our mask to the head a
time finished
Realization:
We will draw our mask on the EVA rubber or cardboard.
We can help ourselves with a sketch before drawing the final one.
We will cut it out and draw the facial tattoos.
Suns radiating around the eyes and curved lines on the eyebrows
and cheekbones.
For facial decoration we can also help us with a previous design.
Once the facial tattoos are done, we will review the pencil with
liquid paint or, failing that, with wooden paints or felt pens.
We will cut strips of kraft paper to simulate esparto grass.
We will braid some to decorate on the sides and even, if we want
to decorate the chin area.
Other strips we will crinkle them a little and we will group to
form the nose. We will tie these strips together with hemp thread
or some similar thread / cord.
We will glue the braided paper on the sides and the grouped with
ties in the nasal area to the forehead and leaving a plume
outstanding above.
We respect the drying time of the glue or glue.
To finish, we will put the rubber and we can enjoy our mask.
......
kalathos íbero from MARQ Arqueológico de Alicante on Vimeo.
-Cylindrical/tubular container, if possible to be made of cardboard
-Meter and ruler
-Kraft paper or similar
-Cardboard
-Compass
-Scissors
-Glue
-Pencil
-Liquid paint (tempera or acrylic) black and red or failing markers or color pencils
We will take measurements to our container and we will mark them on the paper, leaving an inch and a half, along, both above and below and at the top on one of the sides. In this way we will make the flaps to stick to the container.
We will draw on the cardboard the mouth of our container and with the compass we will draw a concentric circle, larger, one and a half centimeters.
We will cut the circle, outside and inside, and paste on the paper.
With the compass, we will again make circles concentric to the cardboard. Both of centimeter and a half. One external and one internal.
We will cut the strip of paper that will line our container and also the circle, respecting the centimeter and a half of paper that we have left on the outside and on the inside, to generate the tabs, since the outside will line the bottom and the inside It will serve to connect these flaps to the mouth of the container.
Once we have everything ready, with the pencil we will begin to draw, on the paper, the Iberian decoration that we have chosen. We will draw it without having glued or joined the pieces. It is a more comfortable way of working.
Now, once our decoration is drawn, it is time to stick the paper strip to the container and the circle to your mouth. Always helping us with the generated tabs.
Once our kalathos is assembled, it is time to color it.
If we have liquid paints add four parts of red, one of black, and thus we will get a more suitable garnet color for the decoration of our piece.
Assuming that we will use only those two colors to decorate.
Black and garnet/red.
Once we have given color to our decoration we would have our kalathos ready.
NOTE: We must respect the drying time of the glue before starting to color it. Otherwise the part will be disassembled.
.........
An idol is a image with human face or human body shape. Idols are sacred objects made 5000 years ago in order to represent ancestors or ancient leaders from their communities. Eyes were most represented in idols, in order to give them a human appareance. Eyes were represented in sunny-shapes and they were made with animal large bones, marble or stone plaques.
Do you dare represent your own cylindrical idol? And keep your eyes peeled!
salt paste (1 cup of white flour + half a cup of fine salt + water until the dough is obtained)
toothpick
Make a cylinder with the salt paste.
Decorate with the toothpick making soliform eyes, facial tattoos and hair.
Let dry
The cylindrical eyed idols were made with Stone or bones. They were sacred objects and probably represented the Neolithic and Calcolithic people ancestors.
Idols face appears in large size in order to represent its importance. However, the most important part of their face are the eyes. Eyes are represented like two big suns (sun-eyes). Beside the eyes, sometimes there are some curves that point the eyebrows out.
It could be an important object for us, because we could keep our study equipment inside.
video porta lápices from MARQ Arqueológico de Alicante on Vimeo.
3 rolls of toilet paper
kitchen paper
water
white glue
paintings (acrilics, watercolors, waxes...)
pens
piece of rope or string
brush
scissors
double-sided tape
Prepare the water and white glue mixture (equally).
We cut with the scissors two of the rolls at different heights.
We line the rolls of toilet paper by sticking pieces of kitchen paper with the mixture of glue and water with the help of a brush.
Let it dry.
Once ready, we will paint them in white, beige, or simply white with a yellow touch.
Let it dry.
Now it's time to make each of our "idols" their "eyes-sun” and facial makeup. We can do it with a pen or with a brush .
Finally, we will put toghether our three “idols” with the doublé-side tape.
To reinforce the union, and give it a decorative touch, we will put around a piece of string or string.
And we'd have our prehistoric pen holder ready to organize our paintings.
I hope you like ☺!
.............
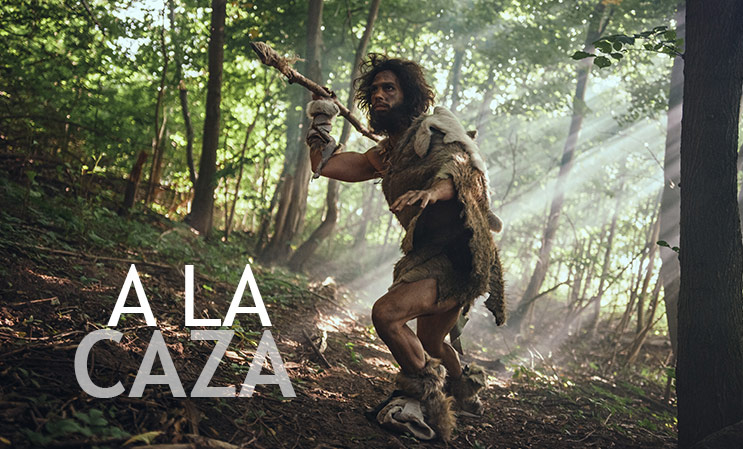
Prehistoric people made tools for hunting. They shaped river stones, by hits. They used these tools in order to make pointed spears in wood with wich take down their preids. Over time, spears were made in wood and bone, and they were armed with assegais and lithic points.
During Metal Age, point arrows were made for hunting too.
Points of spears and arrows were tied to the shaft helped by some robes that were made with animal tendons. Possibly, prehistoric people put a slot at the end of the shaft in order to put the flint point and then, tied it with robe. You can see this on the arrow points that usually had a stem wich enter on the shaft.
hunting workshop from MARQ Arqueológico de Alicante on Vimeo.
We will need:
Steps:
1. We take folio, cardboard, eva rubber, etc. and we cut a piece. If, for example, we use brown cardboard, we can already achieve the effect of wood, otherwise we will take some colored pencils or markers and paint it trying to simulate that it is wood.
2. We will make a churro and stick it. I, for example, used Fixo all over the trunk to make it harder.
3. We will make the spearhead in the way that we like, we can even do several and be able to exchange as we want. To do this on the cardboard or eva rubber, we will draw the stone and cut it out, making another one to glue them to the pole on both sides.
Formerly, the horn and stone were hooked with the tendons of the animals, since they took advantage of everything. We to simulate that, we can use wool, rope, scrap paper, we want.
4. Then we can have some kind of decoration. Before you could carve and decorate the part of the shaft. By having it in another type of material, either cardboard or eva rubber, what we will do is cut out other pieces of cardboard or some leftovers that we have at home, either from painted cardboard, or with another type of material and we will make the decorations that most we like them.
..................
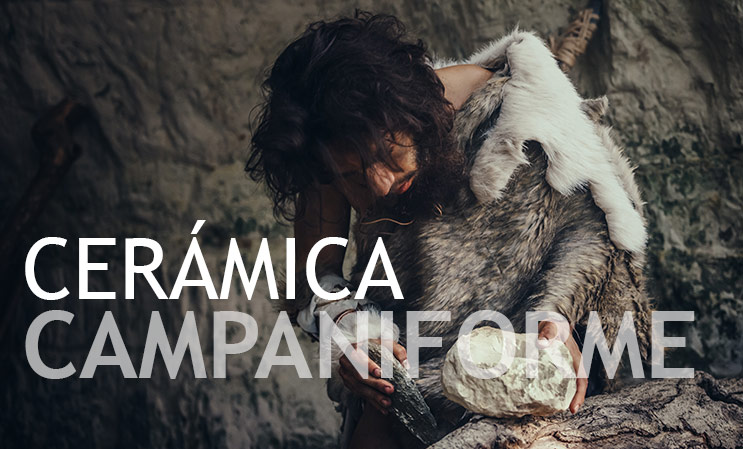
Firts signs of copper metalurgy in Alicante are tie a kind of special pottery from Western Europe wich is called “Campaniforme”.
This pottery has a flared shape with a characteristic decoration well made by printed motifs, among those that predominate horizontal sash and triangles. Pottery appears in towns located on plains, in new settlements located on top of hills and in burial caves.
All this pieces esemble is binded a time together that, named as Campaniforme (2500-300 a.C.), announces characteristics typical from Bronze Age.
Campaniform bowl workshop from MARQ Arqueológico de Alicante on Vimeo.
-Clay or, failing that, modeling clay (plasticine)
-Tools/elements with tip:
Punches, skewers, sticks, burins, pencils, pens, etc.
1st. Once the clay or plasticine block has been obtained, we will start working according to the size of the material we have.
2nd. We take a piece and make a ball/sphere that we will later crush on a surface, giving it a thickness of a burger more or less. This will be our base.
Later we will be making cylinders more or less the thickness of a finger. Or a little more, if we have enough material.
3rd. The cylinders will be placed on the base in the form of a donut. Always on and not around.
4rd. When we have a height of three or four threads, it is time to join them between them and the base. This process is called "sewing". With the pad of the thumb or index finger, and with great care, we will be sewing the clay/plasticine from top to bottom to create uniform walls. We will repeat the process also on the inside and we will widen the cavity of our bowl, always caressing with the fingertips, exerting pressure slightly outwards and never making the clamp with our index and thumb fingers.
5rd. It is time to decorate with the tools we have. Always under the supervision of an adult. We will make a geometric decoration through an incision and with little pressure, since the material to be decorated is soft and would easily go through be damaged.
And with this we would have our campaniform bowl ready.
NOTE: In case of using clay, let it dry long enough, in a ventilated place and in half shade. Never under direct sun.
..........
.jpg)
In the Neolithic Period, big variety of pottery appears. Prehistoric people use pottery for cooking or as wáter and grain container.
There are two kinds of art in Prehistory: paintings on caves or rocks, and portable art on objetcs they could carry.
We find eschematic motifs, specifically “sun-shape” motifs (irradiate suns) on cardium pottery of Cova de l’Or. Also in this site were found pieces of pottery with zoomorphic motifs (goats and deers), represented on neolithic pottery.
sunny pottery from MARQ Arqueológico de Alicante on Vimeo.
1st. We will take measurements on paper to line the bowl.
2nd. Once you have the appropriate measurements, flaps will be made (horizontal measurement above and below) to mold to the bowl and stick inside and at its base.
3rd. Once lined we will make the decoration with pencil to be able to admit correction.
Remember that our decoration will be with sun-shape motifs (circles with perpendicular lines that symbolize sunbeam) and zoomorphic (goats and deers).
4rd. When the decoration is to our liking, in this case soliform decoration, geometric shapes and zoomorphic shapes, we will proceed to review with markers or colored pencils
And our bowl with soliform decoration would be ready.
........
We find prehistoric cave paintings around the world. Cave paintings represent the human beliefs and fears during thousand of years.
Some places with prehistoric cave paintings are so important that are included as part of the World Heritage List of UNESCO.
This cave paintings are made on the walls, or on rocks and stones outside.
In Alicante province we have four different prehistoric art styles: paleolith art, macroeschematic art, levantin art and eschematic art.
A really archeological heritage that deserves to be known and protect.
Painting workshop from MARQ Arqueológico de Alicante on Vimeo.
Step 1: Add the flour, salt and add the water little by little until the dough is formed. If the dough is very liquid add more flour .
Step 2: give the dough rectangular shape.
Step 3: with the pencil you will draw on the dough by pressing, you can make a sketch before you start.
Step 4: paint with the brush with the red paint on the pencil drawing, then you will let it dry and you will have your cave painting.
-------------------------
In Prehistory, people made their own clothes with skin of hunted animals (deers, goats, bisons,…). They didn’t use it just as they got. It was necessary to clean it properly, taking off the connective tissue and fat rests. In order to this, they used lithic tools (scrapers). Then, they let it dry, probably close to a bonfire.
Archeology has brought bone needles, used for sew up every part.
In Prehistory, people didn’t use thread but tendon animals.
Firsts decorative ítems preserved from the nearly Neolithic are drill shells, rings made by Split long bones and Stone bracelets – smooth, decorated or forms by two perforated pieces fixed by fiber.
Taller de prehistoria 1 from MARQ Arqueológico de Alicante on Vimeo.
Garbage bag
Eva rubber, cardboard, foil, etc.
Scissors
Piece of rope, bow, shoelaces, etc.
1. We take the garbage bag and cut the ends to be able to remove the arms. We do the same in the center of the bag to be able to get the head out from above. It must be like a bag. You can also decorate the bottoms, making spikes.
2. We take cardboard, eva rubber, foil, or any material that we have at home to put the spots on the dress and simulate that it is the skin of an animal. If we do not have any of these materials, we can take the cartons from the milk packages or cereal boxes and cut them out.
3. We are going to draw some cockle shells to make a necklace for ourselves. We will draw 3 or 4 depending on the size you want and then we will make small holes in the area that joins the two leaflets and pass the lace through there.
4. We can make some adornment so we will take a piece of cardboad and then, we will paint it in white, simulating bones.
-------------------------


Localización | Horarios | Tarifas | Mapa web | Política de privacidad
SEDE ELECTRÓNICA | info@marqalicante.com | Tlf.: 965 149 000

![]()
![]()
![]()
![]()

Página diseñada y realizada por
CREHAZ
COMUNICACIÓN Y TECNOLOGÍ