PIECE OF THE MONTH. Black varnish cup

|
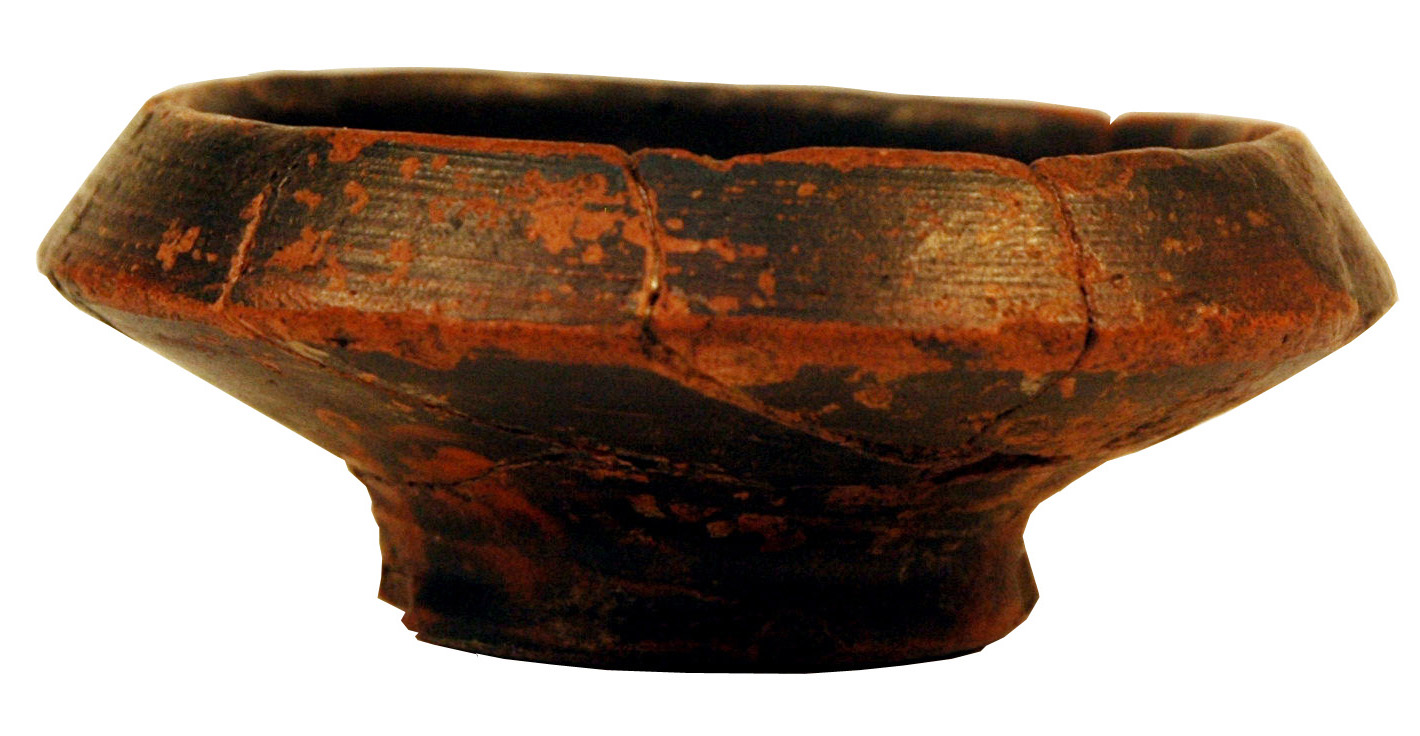
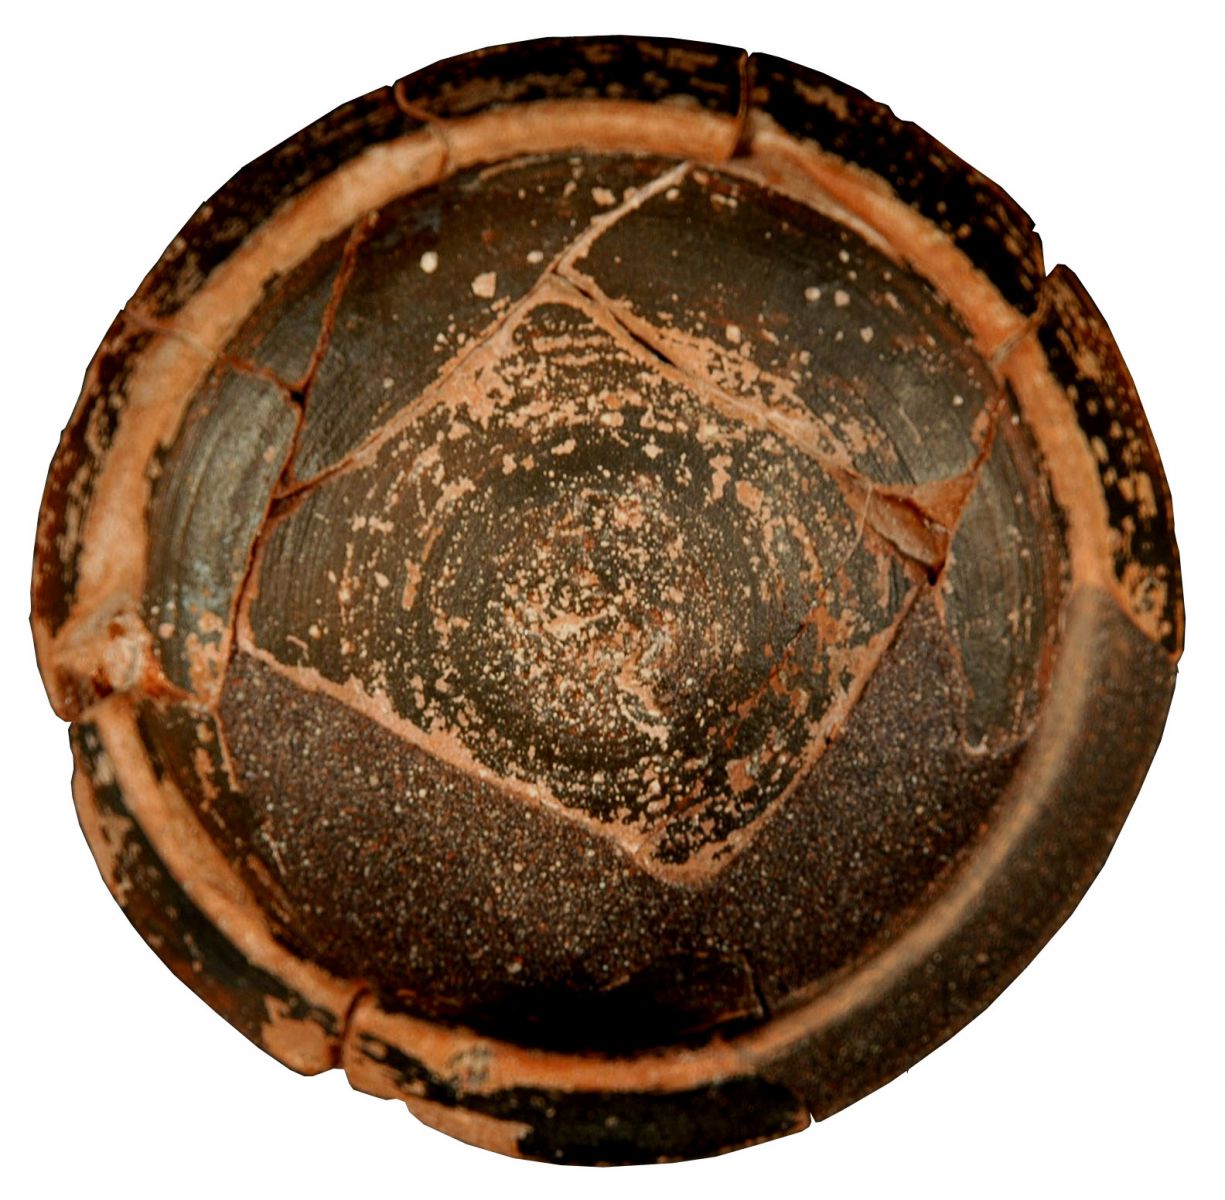
BLACK VARNISH CUP Tossal de Manises (Alicante)
Ceramics
CS: 5885
Restoration: Andrea Sanz Catalá (25/11/2014)
|
Almost complete cup from the excavations at the Tossal de Manises site./Lucentum (Alicante). The lathe-wrought ceramic cup, with engobe/embossing treatment on the surface, made with black varnish, allows it to be ascribed to type A Campanian ceramics (Lamboglia 34b; Morel F 2744). It is currently owned by the Provincial Archaeological Museum of Alicante-MARQ, and is located in the Visible Warehouse XXXII 2, and is in the Restoration Laboratory as part of the programme for the revision of pieces from the aforementioned warehouse. Restoration work began on 03/04/2014 and finished on 30/05/2014.
The first task of a restorer before undertaking the recovery tasks on a piece is to carry out previous studies which serve as a starting point and support for the treatments that will have to be applied later on to the piece. The exhaustive analysis provides us with data on the nature of the material and the pathologies suffered by the piece, studying the causes that have produced its alteration or degradation in order to determine the most suitable treatments and select those that are most advisable to ensure the recovery of the piece, its restoration and its subsequent conservation.
State of Conservation
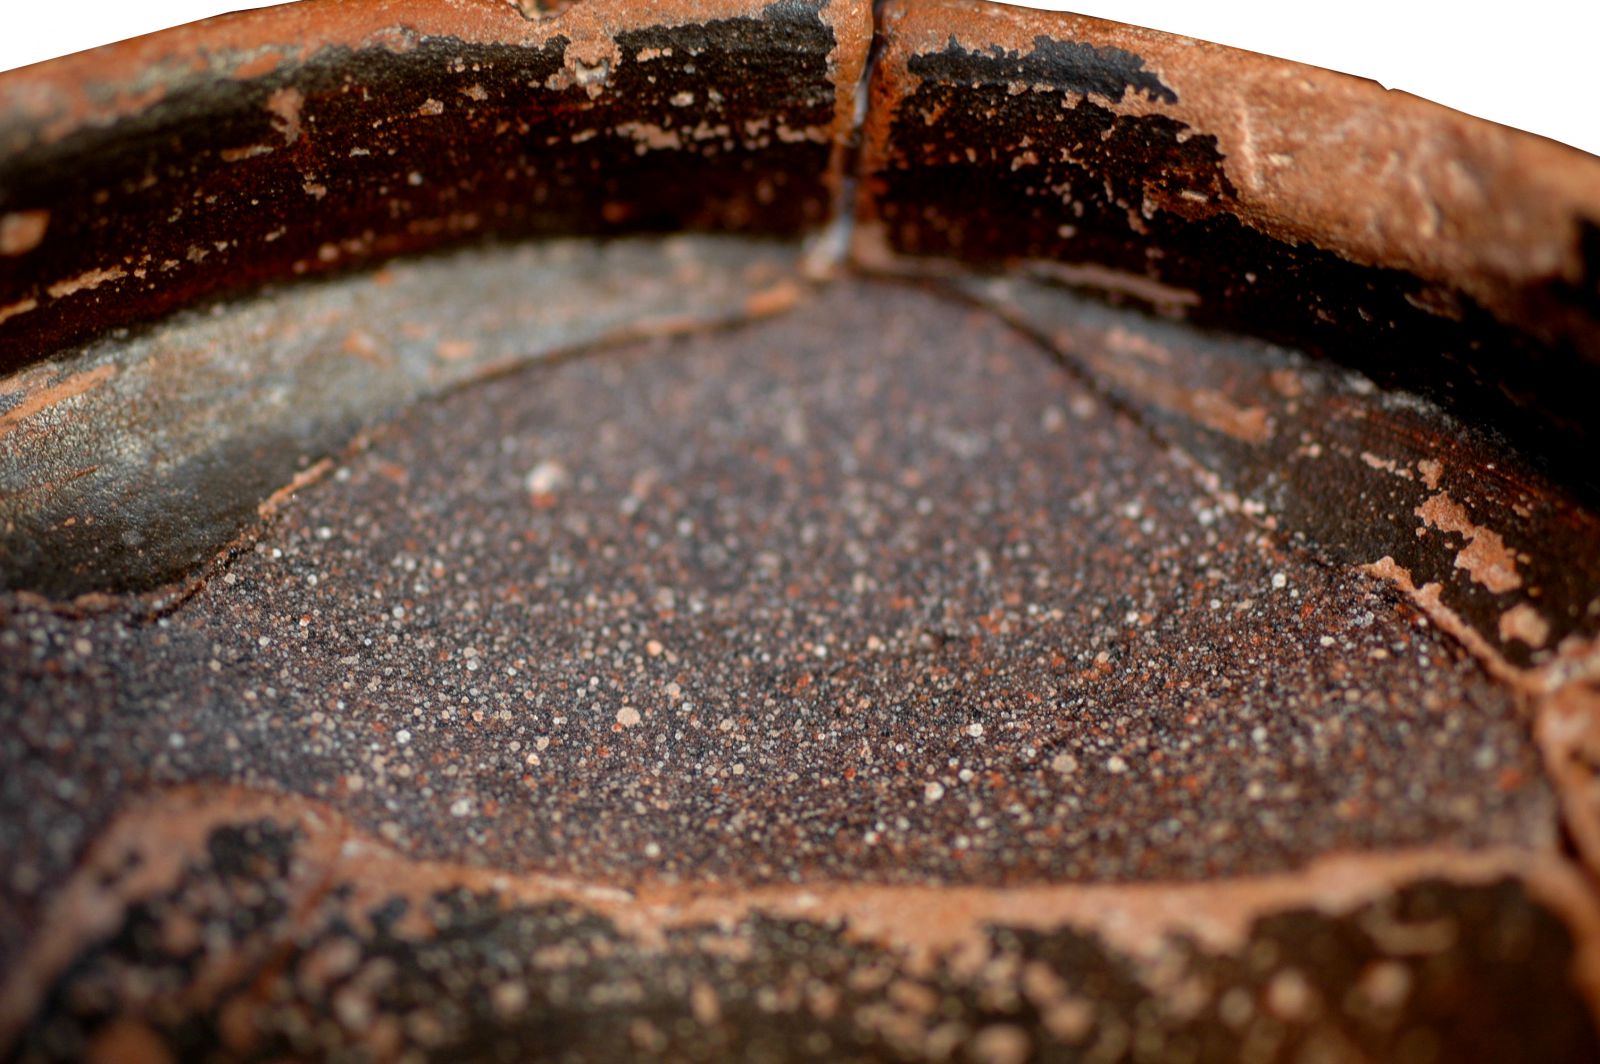
The general condition of the piece is fair, as the 80% is preserved, although it is consistently fragmented and with eroded edges. The ceramic material is compact and there is the presence of soluble salts on the surface and, of course, losses in the ceramic piece. The decoration of the piece is not very consistent as 60% is preserved and is very eroded as the losses of the slip are due to chipping.
Old Restorations
The piece has been restored at some point in the past, but there is no restoration record or information about it. It can be seen that the work carried out was a total reconstruction using unsuitable materials, such as poor quality pigmented plaster, which is harder than the ceramic material and excessively covers the original parts of the piece, ignoring all conservation and restoration criteria. These interventions may have been carried out either by archaeologists or restorers of previous generations, who were generally not concerned with guaranteeing the reversibility of the materials or the aesthetic part, causing damage to the piece. These old interventions should be documented as they form part of the history of the piece.
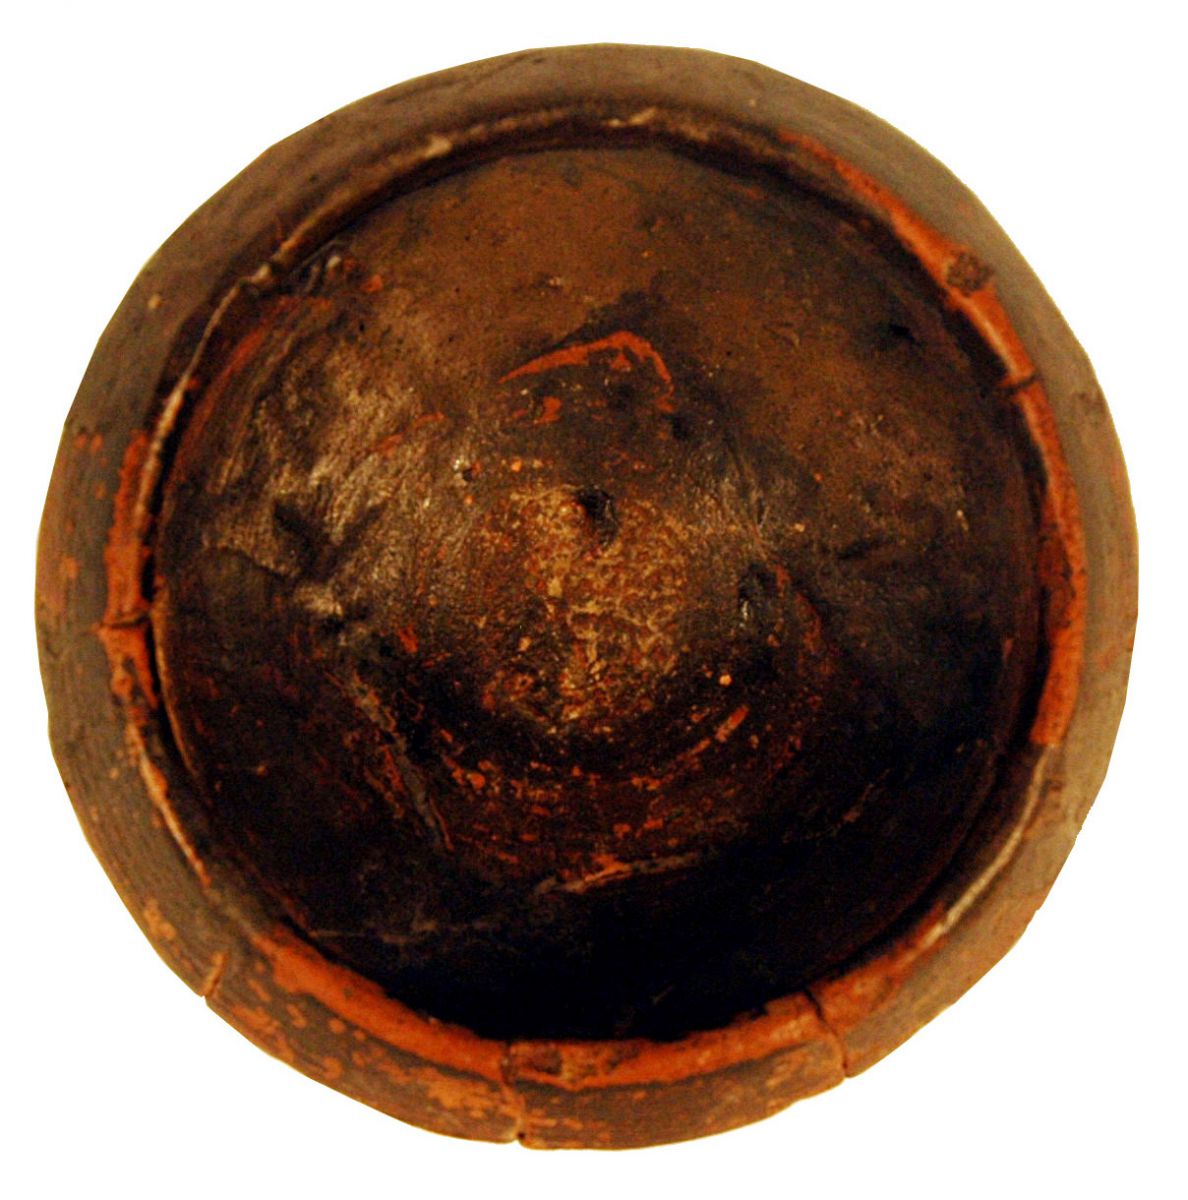
INITIAL PROFILE | INITIAL REVERSE |
 |  |
Intervention Process
Every restoration process begins with an intervention proposal that must be carried out schematically, reflecting all the steps that will make up the complete work process. The starting point is that each piece is unique and irreplaceable from a cultural, historical and artistic point of view, and therefore there can never be two identical intervention proposals. In this way, a logical order of action is established in order to construct a correct working methodology after a good preliminary study. In this case, the process has been as follows:
Dismantling
The piece was initially immersed in an acetone bath as this is the quickest process. In addition, we have already advanced part of the cleaning process.
Physical Cleanliness
A physical cleaning with acetone was carried out to remove surface stains and concretions using a swab. The cleaning surface should not cover more than 6 cm² in order to control the cleaning. This is done gently and with circular or rotating movements, never rubbing, as this generates unwanted surface stubbornness.
Desalination
The elimination of soluble salts is done by neutralisation. When water is added to a soluble salt, it dissociates into ions and a neutral reaction known as hydrolysis takes place. This elimination of salts is carried out by repeating baths and measurements with a conductivity meter every 48 hours. Once the measurements repeatedly approach 0, they are dried by means of an airing system where the pieces are spread out on blotting paper.
Edge protection
In order to ensure the reversibility of the stuccos to be applied and to protect the piece with the maximum guarantee, an intermediate film is applied between the perimeter fracture of the lagoon and the stucco with Acrylic at a concentration of 5%. Before moving on to the next process, a pre-assembly is carried out, which is the study to successfully tackle the task of assembly, thus analysing the physical spatial location of each fragment and organising the order of placement. With the pre-assembly study, the percentages of the pieces are evaluated in order to plan the restoration as long as it exceeds 60% of its totality. This pre-assembly was carried out using easily reversible cellulose adhesive tapes.
Chromatic reintegration
The next step after the volumetric reintegration with the well-finished stucco is to apply the colour, relegating the gaps treated with the stucco to the background. As the area has already been waterproofed with acrylic resin for protection or security, it is not necessary to reinforce it again. Initially, a layer of flat neutral inks is applied, always in the same colour as the ceramic paste, as this is the most commonly used technique in the reintegration of archaeological ceramics, as it harmonises the final result better. The method is to achieve a colour as close as possible to the original, being of a tone below; to ensure the right colour, colour tests are carried out on a base of the same stucco used for the reintegration. The paints used for this purpose are acrylic, as they are opaque and easily reversible.
Then, once the colour is applied with a brush on the surface of the lagoon and it is completely dry, it is stencilled with the darkest colour, in this case, the black varnish, using the airbrush technique, resulting in a flat ink applied in several strokes.
STUCCOED LAGOONS | FLAT CHROMATIC REINTEGRATION |
.jpg) | 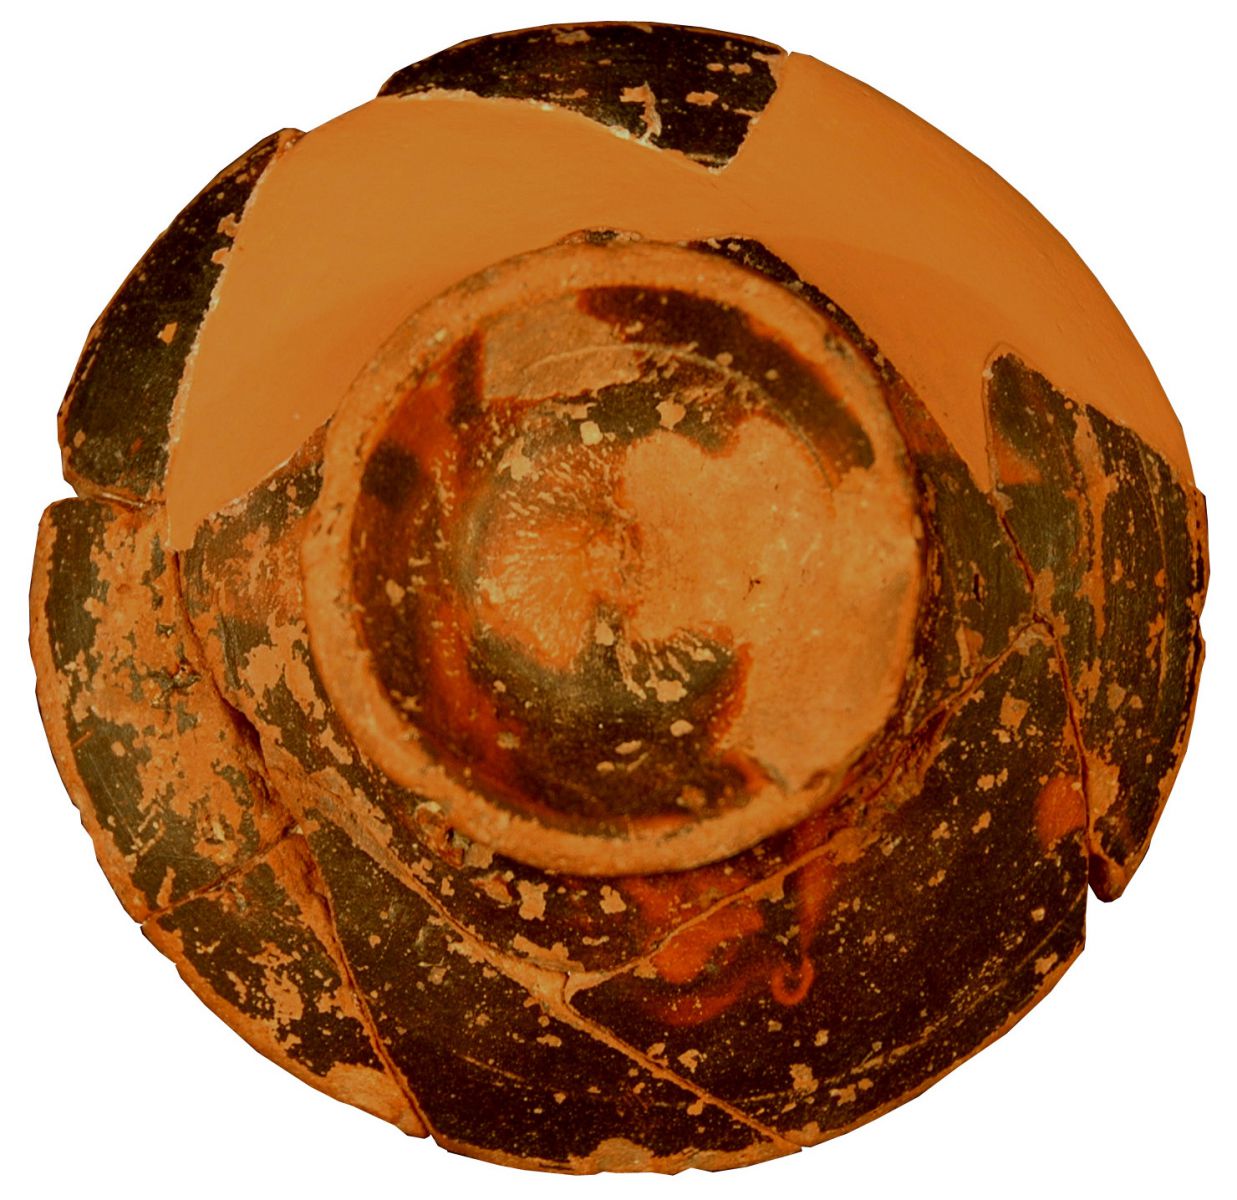 |
CHROMATIC REINTEGRATION WITH AIRBRUSH. STENCILLING
Final protection of the lagoons
As a final protection for the pictorial reintegration of the lacunae, it is always advisable to apply a matt or gloss varnish to the treated surface, depending on the finish of the ceramic piece. In this case, a gloss varnish was applied in a subtle manner so that the gloss of the lacuna would not stand out above the original.
OPENING PICTURE | FINAL PHOTOGRAPH |
|  |
CONDITIONS FOR THE MAINTENANCE OF THE PART | ||
| HR | T |
Environmental conditions | 45-50% | 18-22ºC |
Transfers | 45-50% | 18-22ºC |
PHOTOGRAPHIC DOCUMENTATION | |
Home | 05885-I-01 through 05885-I-06 |
Process | 05885-P-01 through 05885-P-12 |
Final | 05885-F-01 to 05885-F-07 |